Pages
- A RULE-BASED TOPOLOGICAL MODELER GENERATOR
- Inference of topological operations: illustration in geology
- Japhy : une plate-forme mécanique et topologique utilisant un langage à base de règles pour l’animation physique.
- JerboaEclatement
- Joptop – Jerboa Optimisation Topologique
- Lesson 1: Discover topological structures of Jerboa
- Lesson 2: Discover embeddings and orbits
- Lesson 3: Modify and write a first rule
- Lesson 4: Write embedding expressions
- Lesson 5: Design topological transformations
- Lesson 6: Utilize the execution cycle of rules
- Lesson 7 : Write scripts in Jerboa
- Lesson 8: Create your own modeler
- Model reevaluation based on graph transformation rules
- Topological inference for subdivision schemes
In this lesson you will learn how to manipulate the embeddings of objects with embedding expressions just like the ones you modified in Lesson 3. You will be using the same modeler for witch you will create new rules for the modeler with the editor, export them to the project and use the corresponding operations through the viewer.
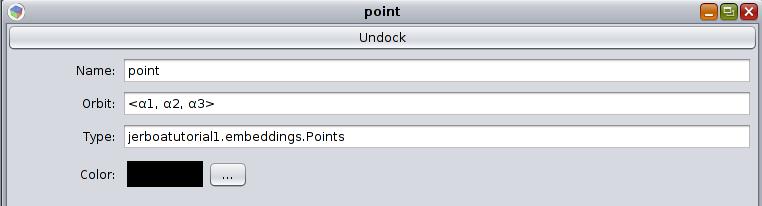
Every embedding that you wish to include must be declared in the editor by clicking on “New Embedding”, giving it a name, an associated orbit and a type (which is either an existing java class or one that you can write yourself in the embeddings package of the project).
OBSERVING EMBEDDINGS
- open the editor and right click on the points embedding on the left of the screen under the embeddings label then click on modify (see Screen 4.1)
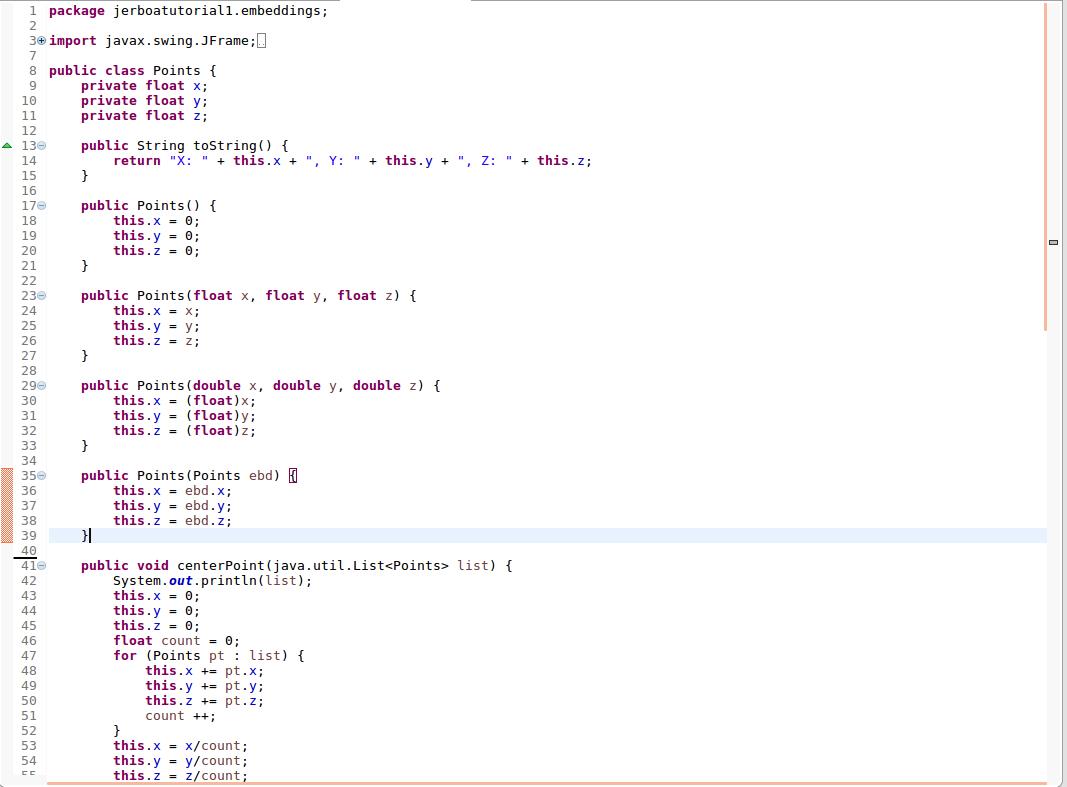
- now open your IDE and open the
Points.javaembedding to find out what methods are at your disposal, observe the copy constructors (see Screen 4.2)
ACCESSING AN EMBEDDING
You will write a rule which translates an object and changes only the point embedding of each vertex so as to place the object twenty points higher than it’s original position.
- open the editor and create a new rule called Translate
- place a node in the left pattern with the orbit to match the whole connected component (i.e. <α0,α1,α2,α3>) and make it a hook
- place a node in the right pattern identical to the one in the left pattern (with the same orbit) (see Screen 4.3)
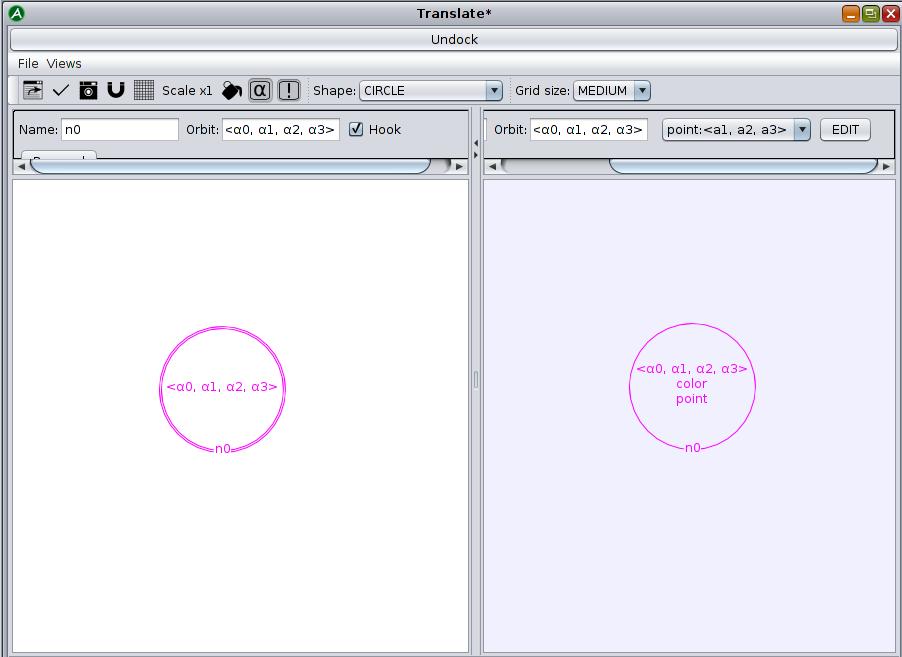
You will notice that the node in the left pattern is called n0 and the one in the right pattern is called n0 as well because it corresponds to n0 in the left pattern and it hasn’t been changed which means that the sub-graph matched by the left pattern will be preserved by the rule.
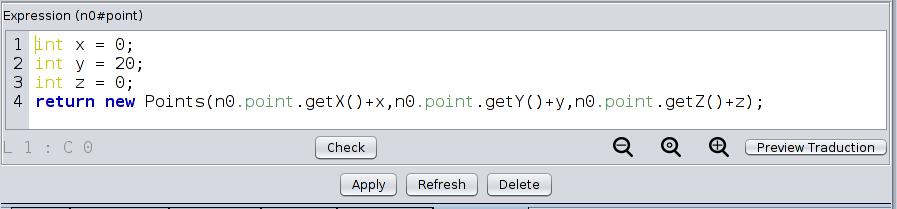
n0.point will return the point embedding of the current dart matched by n0. - write the point expression for
n0(see Screen 4.4)- use the
getX(),getY()andgetZ()methods from the Points class to get the values of attributes x, y and z from the point embedding ofn0 - return and instance of Points created using the
public Points(float x, float y, float z)constructor and adding 20 to y to translate the point along the y axis - click on « Apply »
- use the
- Save and export the modeler and try out your new operation on any object after having closed and launched the viewer
If you would like your rule to change the color of the moved object you can observe the color embedding expression of MakeRed to give every face a new color. You just need to copy the expression into the color expression of the node in the right pattern of your « Translate » rule to obtain a translated red connected component.
ACCESSING NEIGHBORING EMBEDDINGS
You will now write a rule which gives a color to a face which is the median color calculated from the color of the face and that of the neighboring face. You will need to access the neighboring color embedding to do so.
- open the editor and create a new rule called
MedianColor1 - place a node in the left pattern with the dart orbit (i.e. <>) and make it a hook
- place the same node in the right pattern with the same orbit (see Screen 4.6)
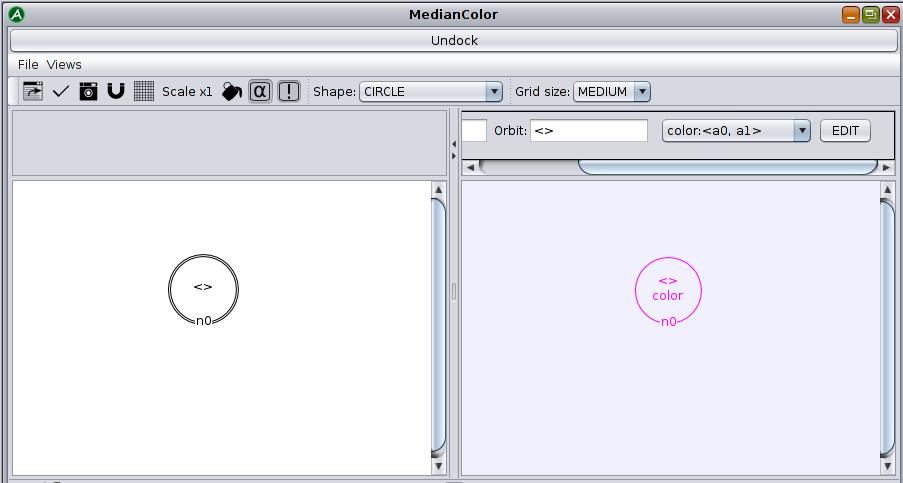
- edit the color embedding of
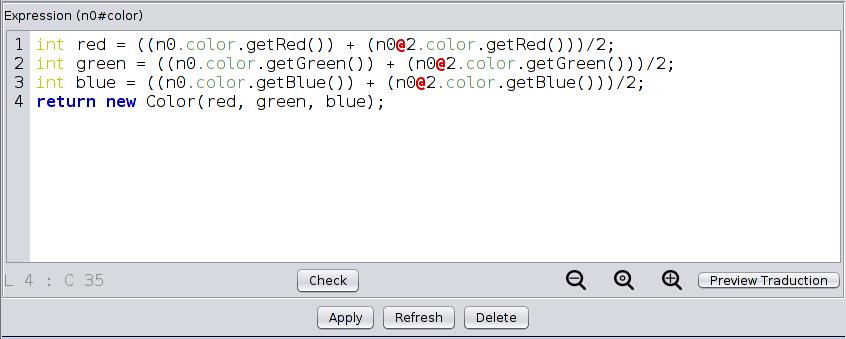
n0in the right pattern (see Screen 4.6)- create three instances of int (called
red, green and blue) which will be given the median of the R value of the color embedding of selected dart and the R value of the color embedding of the selected dart’s neighbor through alpha2 - return a
new Colorwith these new values for the R, G and B attributes - Apply, save and export
- create three instances of int (called
n@i which indicates that you want the neighbor of n through the i-link.
To retrieve the red, green and blue attributes you can use the getRed(), getGreen() and getBlue() methods from java.awtColor.
- try your new rule on the IcositeHexagon by selecting a dart belonging to the face which you want to change color
This rule will be applied to one single dart meaning that the color will be retrieved from the neighboring face which is connected to that particular dart through a 2-link. Depending on the selected dart, the result can vary.
COLLECTING DARTS
You will now write a new rule which calculates the median color from all adjacent faces to the one from which a dart is selected. You will learn how to collect darts and how to use a « foreach » loop.
- open the editor and create a new rule called
MedianColor2(see Screen 4.7) - create a node in the left pattern
- give the (<>) orbit to the node and make it a hook
- create an identical node in the right pattern
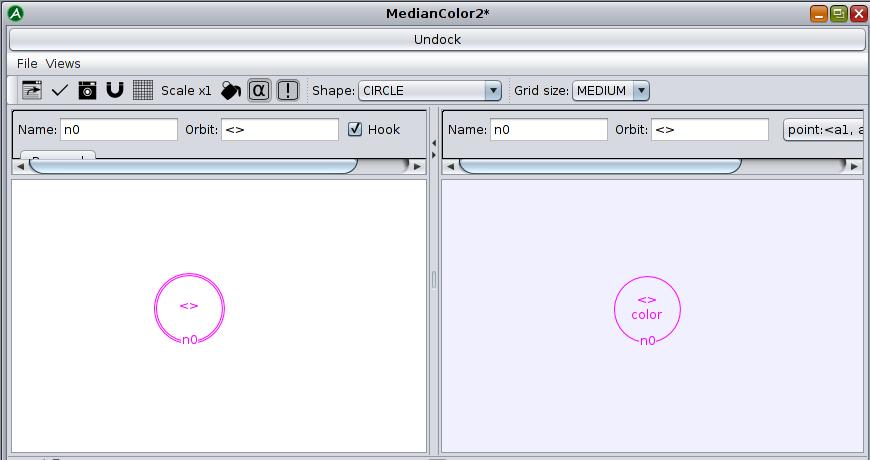
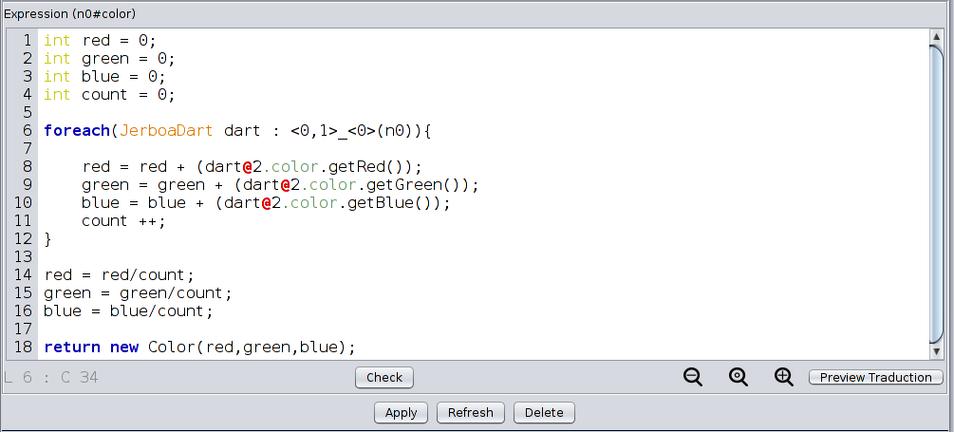
- edit the color embedding expression for that node (see Screen 4.8)
- create four new instances of integer called
red, green, blueandcount(all are equal to 0) - use a « foreach » loop which browses every
JerboaDartas adarton the <0,1>_<0> orbit starting fromn0 - for each
dartadd the value of each component of the color from the color embedding of the neighboring dart through a 2-link tored, green and blueand incrementcount - finally divide
red, green and bluebycountand return a new instance ofColor(red, green, blue) - Apply, save and export
- create four new instances of integer called
You can now try the operation on the IcositeHexagon and compare it’s result to that of MedianColor1
MORE POSSIBILITIES WITH THE LANGUAGE
You can use these operations in the embedding expressions to manipulate the embeddings.
| Operation | Jerboa code |
| Access an « embedding » embedding
Access an i-linked neighboring dart Collect all embeddings of the <0,1,3> orbit Collect the <0> sub-orbit from the <0,1,3>(n) orbit Access the G-map Get the type of the « embedding » embedding |
n.embedding
|
You can also use these classic instructions.
if ([condition]) {
    [instruction]
} else {
    [instruction]
};

while ([condition]) {
    [instruction]
};

for ( [type] [variable] : [condition] ) { //foreach
    [instruction]
};

for i in [beginning] . . [end] {
    [instruction]
};
What have you learned ?
- What methods could you create in the « Points.java » embedding class to translate the instance of point by a given vector?
- How can you collect all the incident faces to a dart n?
- How can you test whether the incident face to n is a triangle?