Pages
- A RULE-BASED TOPOLOGICAL MODELER GENERATOR
- Inference of topological operations: illustration in geology
- Japhy : une plate-forme mécanique et topologique utilisant un langage à base de règles pour l’animation physique.
- JerboaEclatement
- Joptop – Jerboa Optimisation Topologique
- Lesson 1: Discover topological structures of Jerboa
- Lesson 2: Discover embeddings and orbits
- Lesson 3: Modify and write a first rule
- Lesson 4: Write embedding expressions
- Lesson 5: Design topological transformations
- Lesson 6: Utilize the execution cycle of rules
- Lesson 7 : Write scripts in Jerboa
- Lesson 8: Create your own modeler
- Model reevaluation based on graph transformation rules
- Topological inference for subdivision schemes
In this lesson you will learn how to use the Jerboa editor to write rules like the ones you have used in the generated modeler. You will continue to use this same modeler as the first two lessons but you will be running it as a java project and modifying it in the editor.
First let’s set up your development environment.
DOWNLOAD AND INSTALL
You will need an IDE ( Integrated Development Environment). This tutorial is written for the use of Eclipse but you can use the IDE of your choosing, just remember to adjust certain instructions to fit.
You will also need to download the Jerboa Modeler Editor V2 and the Tutorial package.
- the editor is a jar file so you may have to change the access rights to launch it by opening a terminal in the same directory as the jar file and type « chmod 755 JerboaModelerEditor.jar » if you are using linux
You should now be able to open the editor with a double click on the file icon.
- copy the « JerboaTurorial1 » package to your IDE workspace and unpack it
- open the « JerboaTutorial1 » project in your IDE of choice
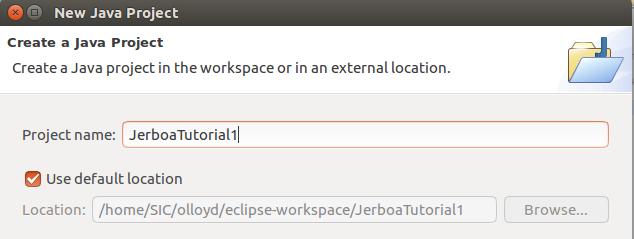
In eclipse this is done by creating a « New Java Project », giving it a name « JerboaTutorial1 » and setting the « JerboaTutorial1 » folder as the project directory as shown in screen 3.1.
You should be all set!
MODIFYING YOUR FIRST RULE
- open the project in your IDE
- launch the viewer this time by executing the « Launcher » file in « src – jerboatutorial1 » (right click – run as – Java application)
- execute “c_IcositeHexagon”
- select a dart on the object
- apply the “MakeBlue” rule and observe it’s behavior
A rule in Jerboa includes the transformation of a graph (which is the topology) and the modification of embeddings (the geometric, physical and applicative characteristics). A rule consists of two patterns, the left pattern specifies which sub-graph is to be matched (the matched sub-graph is the one to which the rule is applied) and the right pattern specifies which transformations are to be applied to the matched pattern. Each embedding of the transformed pattern can be modified with an embedding expression in the Jerboa language.
- open the Jerboa editor that you downloaded and load the editor (go to « file » « load » and select the « jerboatutorial1.jme » file which you will find in the main directory of the JerboaTutorial1 java project)
- double click on the « MakeBlue » rule in the Lesson3 folder, it will open and you can now edit it (see Screen 3.2).
This rule is exactly the same as the MakeRed rule from Lesson2 only it makes faces blue instead of making them red.
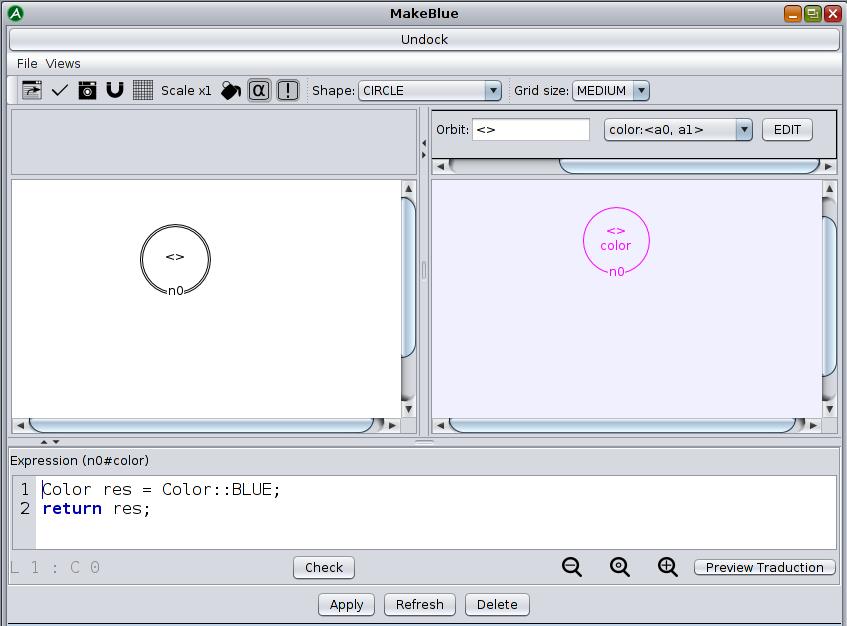
Note that the node in the left pattern has two rings.
The orbit of the nodes in the left pattern indicates which arcs are to be used to match the sub-graph starting from the hook (in this case <> is the orbit of a dart).
- change the color embedding of the dart in the RightPattern
- click on the dart in the RightPattern
- select the color embedding and click EDIT
- change the color in the embedding expression (see Screen 3.3) (using the java.awt.color preset colors like « color::YELLOW »
- click on « Apply »
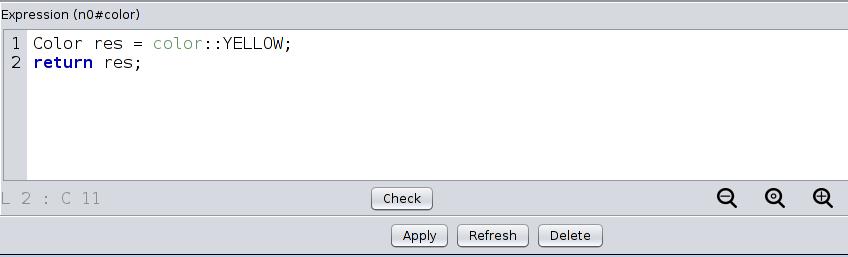
It is important to always click on « Apply » when modifying an expression to make sure it is saved to the rule.
- rename the rule to fit the color you chose by opening the « Details » tab (see Screen3.4) and changing the name
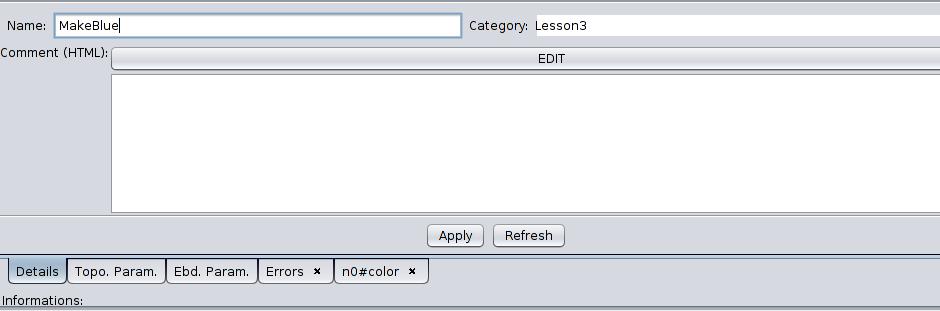
- click on Apply, save the modeler (ctrl+s) and then export the code to the project (file : export Java)
Remember that if you only export the modeler without saving it you will be able to use the rules you wrote in your modeler project but you won’t be able to modify them the next time you use the editor because your changes won’t have been saved to the modeler.jme file. Think to save the modeler as regularly as possible.
- open the IDE, refresh the project to update the modeler and execute the Launcher again after having closed it
- try the first steps again to see what has changed when you apply the new rule, you should see the faces around your selected dart change to the color you chose
MODIFYING A SECOND RULE
- select a dart on the object
- apply the “MoveDown” rule and observe it’s behavior
- open the editor and double click on the name of the rule to edit it
- change the point embedding on the node in the right pattern
- select the node in the right pattern
- select the point embedding and click EDIT
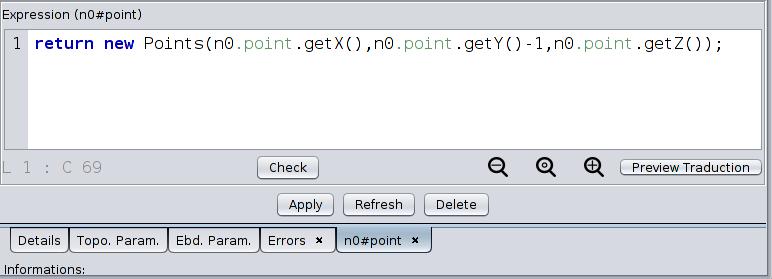
- modify the embedding expression (see Screen 3.5) to change the coordinates of the returned point
- select the node in the right pattern
- rename the rule by opening the « Details » tab and changing the name
- click on Apply, save the modeler (ctrl+s) and then export (file : export Java)
- open the IDE, refresh the project to update the modeler and execute the Launcher again
- try the first steps again to see what has changed when you apply your new rule
WRITING YOUR FIRST RULE
Now you will create a new rule which applies the operations of the two previous rules.
- open the editor and click on the New Atomic Rule button
- call the rule “MakeBlueMoveDown” and press enter
- right click in the left pattern to create a node and then select it with the left click
- tick the Hook box
This node doesn’t need an orbit because when we modify the embedding, this modification will automatically be applied to all the darts in the orbit with which the embedding is associated.
- create a node in the right pattern
- edit the point embedding of the node in the right pattern to be the same as that of the MoveDown rule
- edit the color embedding of the same node to be the same as that of the MakeBlue rule
- save the modeler and export it
- open the IDE, refresh the project to update the modeler and execute the Launcher again
- try your rule on a dart of the IcositeHexagon
What have your learned?
- How many embedding expressions can be written for each node ?
- Which darts are matched by a hook node ?
- What is the difference between saving and exporting?